Automated Documentation in a CI/CD Pipeline for PowerShell Modules with PlatyPS, psake, AppVeyor, GitHub and ReadTheDocs
- Part 1: Intro, Pre-reqs, Components and Build Workflow
- Part 2: GitHub Access Token, ReadTheDocs Account & Project, and Comment Based Help (This Post)
- Part 3: mkdocs & Release Preparations and Pushing the Release
- Part 4: Monitoring the Build, PowerShell Magic, Looking Forward, and Closing Thoughts
Part 2: GitHub Access Token, ReadTheDocs Account & Project, and Comment Based Help
Generate and Configure a GitHub Personal Access Token
Since our Documentation Build process is part of our Build automation we will need to have a way for AppVeyor (where our build process is running) to write the documentation back to GitHub (where our documentation is stored). Obviously, this means we need a way to authenticate from AppVeyor to GitHub to make those changes. We could throw caution to the wind and just hard code our GitHub username and password into /psake.ps1, however, we are security conscious coders and would never do such a thing.
Lucky for us security conscious coders, GitHub offers what they refer to as Personal Access Tokens. These are neat for a variety of reasons such as providing scoped access and the ability to create one for every need. Best practice is to use One Personal Access Token for a single purpose and create more for additional requirements. That means that if you already have a personal access token used for something else, you will need to create a new one for this pipeline.
To create a Personal Access Token follow the instructions here: https://help.github.com/articles/creating-a-personal-access-token-for-the-command-line/ For our purposes, the only scope that is required is public_repo. I do highly recommend using a very useful and descriptive name. I also highly recommend storing the token in a password manager.

Security conscious coders also care about layered security. We do not want put this token in plaintext in our build code. Once you have your token, you will need to log in to your AppVeyor account and create a secure string for your token (as a refresher, you can read https://www.appveyor.com/docs/build-configuration/#secure-variables ).

Once you have the secure string, update /appveyor.yml and modify the access_token environment variable.
environment:
access_token:
secure: +mnipwj1c7UIzB4XZzoxTTZEnsN/i6M3MyskHX/4wQUYCrCL5yQNR/1Qf1ws21bu
Create your ReadTheDocs Account and Project
We need a ReadTheDocs account for us to build our documents. I could not find a premade ReadTheDocs tutorial so for the benefit of all, I’m making one here. The TL;DR is to create a ReadTheDocs account, link your GitHub account, Import your GitHub Project, and modify the documentation type to mkdocs.
For those who want pretty pictures, here you go.
Create Your Account
- Go To https://readthedocs.org/
- Click the Sign Up button
- On the Sign Up Page enter a username, email address, and password

- On the next page click Confirm to confirm your email address
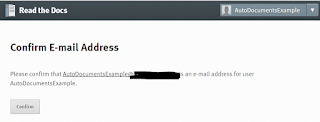
- Check your email and follow the email confirmation instructions


Link Your GitHub Account
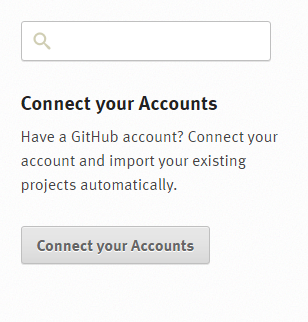
- On your landing page for your new account, Click the Connect You Accounts button
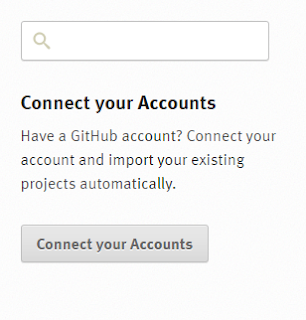
- Click the Connect to GitHub button
- Follow the instructions from GitHub for linking your account
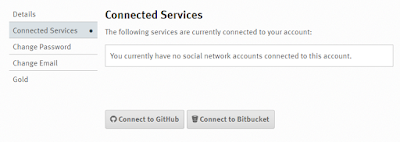
- When you have finished you should see your GitHub account listed under Connected Services


Import Your GitHub Project and Modify the Documentation Type
- Got to your dashboard https://readthedocs.org/dashboard/
- Click the Import a Project button

- Under Import a Repository, click the Plus sign button next to your GitHub repo

- On the Project Details page Check the Edit advanced project options check box and click Next

- Locate the Documentation type dropdown box and choose Mkdocs (Markdown)
- Change the Programming Language to Other (☹ maybe PowerShell will be added someday)

- Modify the Project Home page (I use my GitHub repo as my project home page)
- Click the Finish button


Build your Comment Based Help
The source of all your function documentation will come from your comment based help. The build process will build your documentation directly from your comment based help. You should begin thinking of comment based help as a critical part of your code. If you want to ensure your documentation, you can pester test for it with /Tests/Help.Tests.ps1 test included in the project will fail the build if:
- HelpUri is missing from the function definition
- There is not at least one .LINK entry
- There is no .DESCRIPTION
- There is no .EXAMPLE
- There is not a .PARAMETER for every parameter
- Check your spelling, punctuation and grammar
- PlatyPS will mangle custom formatting, so keep it simple
- PlatyPS will only create proper links when .LINK is a URL.
- The first .LINK should be to the current functions own online documentation and should match the HelpUri
- Include .LINK’s with the full URL to online documentation to related functions instead of just function names.
- If your function calls another, add a .LINK to the called function’s online documentation
- Include .LINK’s with the full URL to related documentation (API’s, MSDN, 3rd Party documentation, etc)
- If one function has a .LINK to a second function, ensure the second function has a .LINK to the first function.
- Add a .LINK to the GitHub page for the source code
- Add a .OUTPUTS that contains a list of fully qualified type names of the objects types your function emits if any
- Add a .INPUTS that contains a list of fully qualified type names of the objects types your function ingests if any
- Be thorough in your description
- Include at least one .EXAMPLE per parameter set
- If your function includes pipeline support, include a .EXAMPLE for each
- If your function includes positional parameter support, add a .EXAMPLE in addition to and not in replacement of a .EXAMPLE with fully named parameters
- If functionality changes update the .SYNOPSIS and .DESCRIPTION
- If you add, remove, or rename a parameter, do the same with the .PARAMETER’s and .EXAMPLE’s
- If you add a new function that will feed into or from another function update the other function’s .LINK’s.
- If you rename the function, update the name in the .EXAMPLE
- If a link changes for a function, update the related functions .LINK’s
Comment Based Help for Get-Widget:
<#
    .SYNOPSIS
        Gets a  Widget from Widget store

    .DESCRIPTION
        Retrieves information about a widget from the widget store based on either ID or Name

    .PARAMETER Id
        GUID ID of the Widget

    .PARAMETER Name
        The Name of the Widget to retrieve from the Widget store

    .EXAMPLE
        PS C:\> Get-Widget -Id b54dfddd-f721-4d3a-ae8a-a1227315a66f

    .EXAMPLE
        PS C:\> Get-Widget -Name 'My Widget'

    .OUTPUTS
        widget, widget

    .NOTES
        Additional information about the function.

    .LINK
        http://autodocumentsexample.readthedocs.io/en/latest/functions/Get-Widget.md

    .LINK
        http://autodocumentsexample.readthedocs.io/en/latest/functions/Set-Widget.md

    .LINK
        https://github.com/markekraus/AutoDocumentsExample/blob/master/AutoDocumentsExample/Public/Get-Widget.ps1

    .LINK
        https://store.adatum-widgets.com/
#>
URL Notes
There are a few things to consider when you are creating your comment based help. First, PlatyPS will create the file names for the documentation passed on the function definition, not the name of the file in which the function is defined. Also, the URLs on ReadTheDocs are case sensitive. If you use a different casing strategy for the file names than you do for the actual function definition, this could lead to confusion. For example, if your function is in a file named Get-Widget.ps1 but the function definition has get-widget, then PlatyPS will create the file as get-widget.md.
Also, it is possible to create your .LINKs in the comment based help without creating the documentation first. The URL follows this convention:
<base ReadTheDocs domain>/en/latest/functions/<function name as defined in function definition>.md
To give you an idea of the URLs for a given function, here are some examples using the Get-Widget function from the AutoDocumentsExample project:
- ReadTheDocs URL:
- Project folder location:
- /docs/functions/Add-Widget.md
- GitHub URL:
- GitHub function definition URL:
- Function definition project folder location:
- /AutoDocumentsExample/Public/Add-Widget.ps1
Go back to Part 1
Continue to Part 3